Yes! you read it right, make your own wireless music streamer but it’s not a conventional Bluetooth based wireless player we have been using over A2DP to your Bluetooth enabled speakers, it’s even better, with the help of a Raspberry Pi you can make just any speakers with 3.5 mm audio connector be able to receive high-quality music from your Android, iPhone, Mac, Laptop or PC placed far away from your music system set up over your wireless network infrastructure (Wi-Fi network). Sounds cool, right?
So let’s dive into this tutorial and make a worthwhile use of your Raspberry Pi, here are the things we will need in order to move further:
Requirements:
Hardware:
- Raspberry Pi (model 3, model 2, model B)
- USB compatible mouse and keyboard
- Monitor for Display (required once for executing the scripts)
- Ethernet Cable (for connecting to local WiFi router)
Software:
- Raspbian, Ubuntu (MATE, Snappy), Debian, most Linux based OS
- git
- GMediaRender (a UPnP™ media renderer)
- Some dependencies (we will cover them during installation steps)
NOTE: Please make sure that your Raspberry Pi and your playback devices (phone, laptop etc) are on the same network.
Installation:
Follow these steps to install and setup the streamer:
1: Tools for bootstrapping the compilation configuration.
sudo apt-get install autoconf automake libtool pkg-config
2: Libraries for gmrender (gstreamer).
sudo apt-get update
sudo aptitude install libupnp-dev libgstreamer1.0-dev \
             gstreamer1.0-plugins-base gstreamer1.0-plugins-good \
             gstreamer1.0-plugins-bad gstreamer1.0-plugins-ugly \
             gstreamer1.0-libav
3: Choose the Sound Server, (Pulse or ALSA) use Pulse for better quality, see the differences here.
sudo aptitude install gstreamer1.0-alsa
sudo aptitude install gstreamer1.0-pulseaudio
Build & Customisation
Now let us build our renderer.
1: Check out the source.
git clone https://github.com/hzeller/gmrender-resurrect.git
2: Configure & build.
cd gmrender-resurrect
./autogen.sh
./configure
make
3: Now run gmrender directly from here if you want. The -f option provides the name under which the UPnP renderer advertises.
./src/gmediarender -f "My Renderer"
Then it will be ready for renderering, as shown below.

You can name your renderer anything you want, based on the location of the sound system (eg: Living Room, Hall etc) or you can name it after your speakers (I have named it Gravity Speakers).
4: Make Final Binary.
sudo make install
The final binary is in /usr/local/bin/gmediarender (unless you changed the PREFIX in the configure step).
Let's Play Some Music
Connect your sound system/speakers to your Raspberry Pi through onboard 3.5 mm audio connector, a normal 3.5 mm to RCA Audio cable would be sufficient for this setup.
Now you will need a UPnP™ controller/client to send some playable content to your Raspberry Pi, I am using BubbleUPnP, you can use any of the UPnP™ client/stream-able App.
- Open BubbleUPnP App.
- Click on overflow button in the top left corner.
- Look for a ‘Local Renderer’, your local renderer will appear under the local renderers’ list, if you are unable to see it, check your phone if it is connected to the WiFi network or not, your local renderer and your phone should be on the same network in order to communicate with each other.
- Select your Local Renderer, now go to Library and select your favourite track you want to play, you can also create a playlist and play all your tracks that are stored locally on your phone. (This is one of the advantages that BubbleUPnP offers over other Apps.)

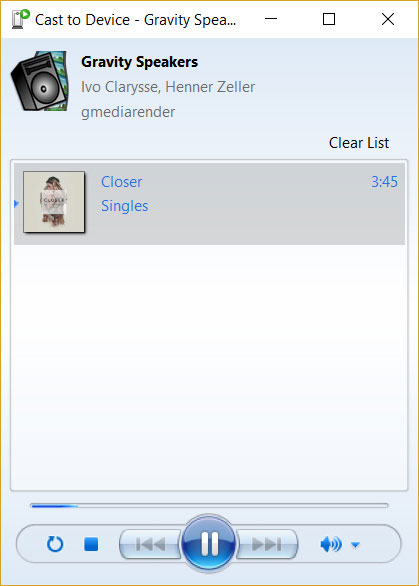
Also on Windows...
Because yeah, fortunately, there is an inbuilt support for streaming UPnP™/DLNA content right from Windows Media Player, so kudos to Microsoft for this. Follow these steps for streaming your content.
- Open Windows Media Player.
- Select your favourite track, in the right side panel, there will be a ‘Play To’ icon on the Play Tab.
- Select this option and wait for your local renderer to appear.
- Quickly right click on the audio file you want to play/stream.
- On the context menu observe ‘Cast Device’ sub-menu.
- Select your local renderer again and Voila!
Now you should be able to listen to your songs streamed over WiFi to your sound system setup. You can add your tracks in this small player Window and create your own digital mixtape.
I hope you enjoyed setup-ing your own wireless music streamer, also one more thing you can add this streaming service to startup boot sequence so you wouldn’t need to connect to a display every time in order to manually execute the command in order to run this service. Special thanks to Henner Zeller for making a resurrected version of the old GMediaRender project and adding useful features. I will leave you with some useful links to make your music listening experience even more enjoyable.
Useful Links:
- The list of compatible stream-able apps/options/features of various platforms (Android, Windows, iOS, MacOSX) is present here.
- And the list of UPnP/DLNA controllers tested with gmrender-resurrect is present here.
- If you want to add a small LCD display to view songs’ info like track name, artist’s info, album etc then make sure to check out this repository.
Thank you for reading.